I bought a table from the thrift store for my sons playroom a few weeks ago for $7.50!! It came with the two chairs as well so this was a great price. Before this table I had an ikea mammut table and chairs which I sold on kijiji for 50 bucks! I had paid 40 for it a year ago so i made $10.00 but it felt like all profit!
Anyways I sold that and used the money for supplies for the wood table.. It took me a while to decide what I really wanted to do with this because I really wanted it to work for a few years and with a baby girl on the way, I needed it to be unisex!
I had thought of a chalkboard table but my mom suggested doing a white board! I took that idea and went to Home depot. The white board paint was crazy expensive! It was 33 dollars and all has to be used within 2 hours so I couldn't sell the leftovers or save it for a future project :( so that was quite a splurge. I also found a gorgeous blue spray paint for 4.50. I also bought a foam roller for 5 dollars. In total, I paid 50 dollars for This table but because I sold my ikea table, it was pretty much free!
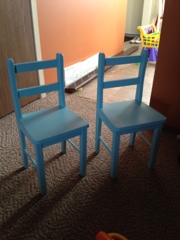
So I got my supplies home and got to work right away. Sanded down the table and chairs and did my very first spray paint job ever! I ran out of spray paint so I didn't do a second coat(maybe next weekend) but they look much better!! The whiteboard paint took a while to apply and I recommend reading reviews for how to apply it.
Anyways here is the finished project! Leave a comment and tell me what u think :)